 Épingler
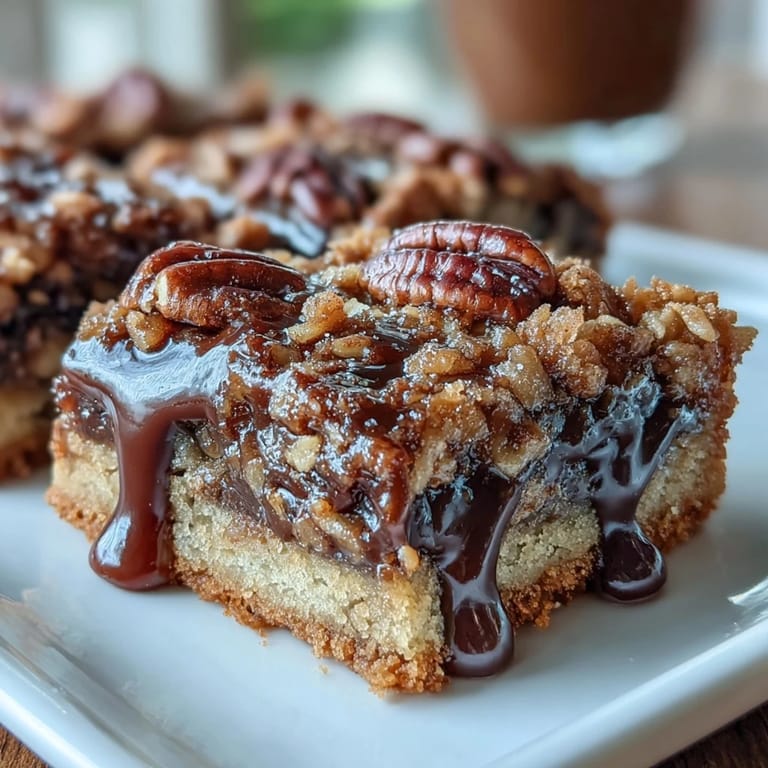
 The first time I made turtle bars, I was attempting to recreate something my grandmother kept locked in her kitchen—those impossible-to-describe squares that tasted like three desserts at once. She'd never share her exact method, just smile and say the secret was patience and not overthinking it. Years later, standing in my own kitchen with melted chocolate pooling into warm oats, I realized she'd been right all along: the magic wasn't in some mysterious technique but in letting each layer do what it does best.
I baked these for my neighbor's potluck once and watched them disappear before anything else on the dessert table touched a plate. She asked me what made them different, and honestly, I think it's because the oat crust stays buttery and tender instead of turning hard and dense like so many bar recipes do. That balance between the crispy-edged topping and the soft center is what people remember.
Ingredients
- All-purpose flour: This gives structure without making the bars dense; it's the quiet backbone that lets the other flavors shine.
- Rolled oats: Toast them lightly if you want deeper flavor, though honestly, they're already nutty enough straight from the container.
- Brown sugar and granulated sugar: The brown sugar brings molasses depth while the granulated sugar keeps things from becoming too heavy and cake-like.
- Unsalted butter, melted: Melting it first means you get even distribution—no random dry pockets in your crust.
- Baking soda: Just a touch helps the crumb mixture bake up tender rather than hard.
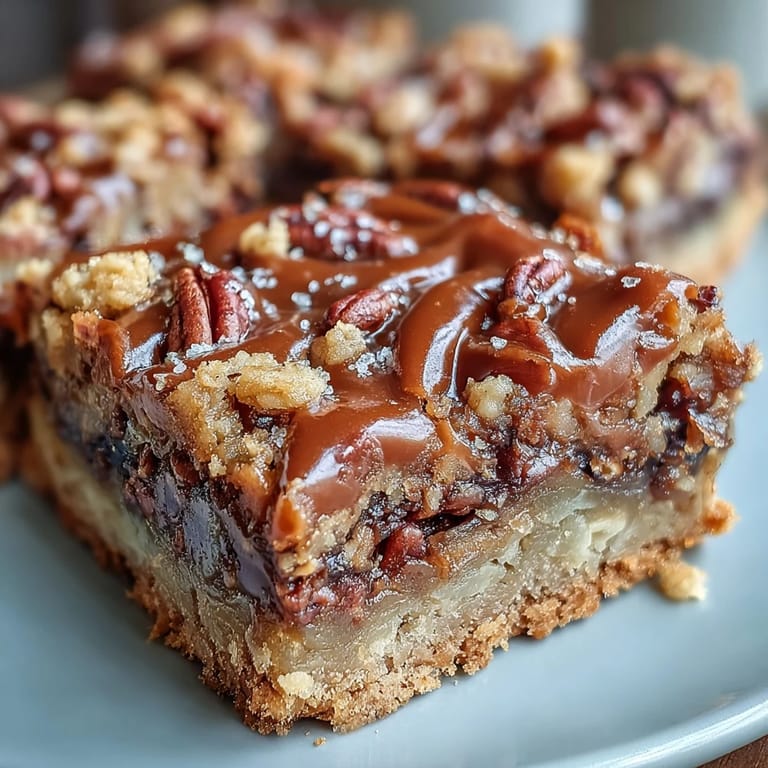
- Semi-sweet chocolate chips: These melt into the warm crust without completely disappearing; use good quality ones if you can because they really do taste different.
- Pecans, chopped: Walnuts work, but pecans have a buttery sweetness that pairs perfectly with caramel and chocolate.
- Caramel sauce and heavy cream: Mixing them together creates a sauce that stays pourable while still coating every layer, and it won't harden rock-solid once cooled.
Tired of Takeout? 🥡
Get 10 meals you can make faster than delivery arrives. Seriously.
One email. No spam. Unsubscribe anytime.
Instructions
- Set your stage:
- Heat your oven to 350°F and prepare a 9x9-inch pan—line it with parchment paper if you want bars that slide out cleanly. This small step saves frustration later.
- Build the crumb base:
- Mix flour, oats, both sugars, melted butter, salt, and baking soda until it looks like wet sand. The texture should hold together loosely when you squeeze it, not be a tight dough.
- Create your foundation:
- Press two-thirds of the crumb mixture into the bottom of your pan, making sure the layer is even. Save that last cup—this is going on top as your golden crown.
- Bake the crust until set:
- Give it 10 minutes in the oven until it just barely turns golden at the edges. You want it firm enough to hold toppings but not so baked that it becomes hard.
- Warm your caramel:
- In a small saucepan over medium-low heat, stir caramel sauce with heavy cream until completely smooth. The cream prevents the caramel from setting too firmly once it cools.
- Layer with precision:
- Remove the warm crust from the oven and immediately scatter chocolate chips across the entire surface—they'll soften from the residual heat. Follow with chopped pecans, then carefully pour the warm caramel over everything so it settles into the nooks and crannies.
- Top and finish:
- Sprinkle that reserved crumb mixture evenly over the caramel layer. It won't distribute perfectly, and that's actually what makes the finished bars look rustic and homemade.
- Final bake:
- Return to the oven for 15 to 20 minutes until the topping turns golden brown. It should look a little darker than your initial crust layer—that's when you know the caramel underneath has set.
- Cool with patience:
- This is the hardest step because they smell incredible, but let them cool completely in the pan on a wire rack. Cutting them too soon means gooey chocolate and caramel all over your knife.
 Épingler
 My daughter helped me press the crust into the pan once, and she took that job so seriously, evening out every edge with the back of a measuring cup. When we pulled them from the oven and cut the first square, she bit into it before they'd barely cooled and said, "This tastes like everything good at once," which I think is the perfect description of turtle bars.
The Art of Layering
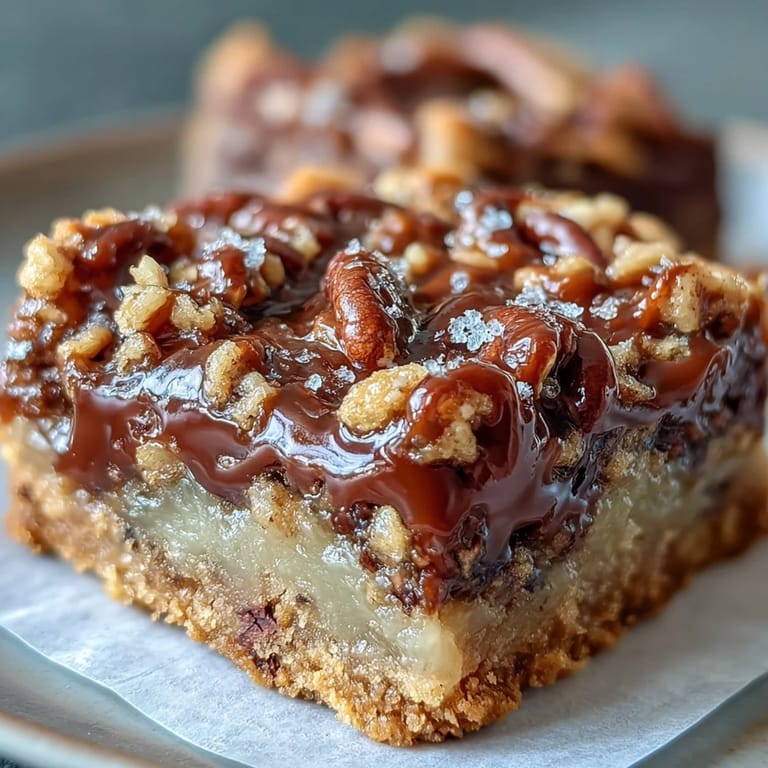
These bars work because each layer has a purpose and a texture that plays against the others. The buttery oat crust provides a crumbly foundation, the melted chocolate and pecans add richness and crunch, the caramel brings chew and sweetness, and the crumb topping browns into something almost like a streusel. Understanding this structure helps you see why skipping a layer or changing the order would throw everything off balance.
Storage and Keeping
Turtle bars actually improve after a day in an airtight container—the moisture settles and the flavors meld together. They keep for a week easily, though in my house they rarely make it past day three. If you want to make them ahead for an event, bake them the day before and store them at room temperature with a piece of parchment paper between layers if you're stacking them.
Ways to Make Them Your Own
Once you've mastered the basic recipe, you can start playing with it. Some people add sea salt sprinkled over the caramel layer, others swap out pecans for walnuts or even macadamia nuts for a completely different flavor profile. You could drizzle dark chocolate over the cooled bars or press a few chocolate chips into the top crust before baking for extra chocolate hits throughout.
- A pinch of fleur de sel on the warm caramel transforms these into salted caramel bars that taste fancy enough for a gift.
- If you want darker, richer bars, use dark chocolate chips instead of semi-sweet, and pair them with pecans for extra depth.
- Make a batch with homemade caramel sauce if you're feeling ambitious—the flavor difference is noticeable but requires the same simple layering process.
 Épingler
 There's something deeply satisfying about handing someone one of these bars and watching their face as they taste that perfect combination of textures and flavors. They're not complicated, but they taste like they are, which might be the best kind of recipe to keep close.
Questions fréquentes sur la recette
- → Puis-je utiliser du caramel maison au lieu du caramel du commerce ?
Absolument ! Un caramel maison apportera une saveur encore plus authentique. Assurez-vous simplement qu'il ait une consistance fluide pour bien se répartir sur les pépites de chocolat et les noix.
- → Comment conserver ces barres pour qu'elles restent moelleuses ?
Conservez-les dans un récipient hermétique à température ambiante. Elles se gardent jusqu'à une semaine. Pour prolonger leur fraîcheur, placez une feuille de papier sulfurisé entre chaque couche.
- → Peut-on remplacer les noix de pécan par d'autres fruits à coque ?
Oui, les noix, les amandes ou même les noisettes fonctionnent très bien. Chaque variété apportera une nuance de saveur différente tout en conservant le côté croquant caractéristique.
- → Pourquoi faut-il précuire la base avant d'ajouter la garniture ?
La précuisson permet à la base de se raffermir légèrement, ce qui l'empêche de devenir détrempée sous le poids du caramel et du chocolat. Cela garantit une texture parfaitement équilibrée.
- → Comment obtenir des carrés bien nets lors de la découpe ?
Laissez refroidir complètement les barres avant de les couper. Utilisez un couteau bien aiguisé légèrement huilé ou essuyez la lame entre chaque coupe pour des bords nets et propres.
- → Peut-on ajouter du sel de mer sur le caramel ?
Certainement ! Une pincée de fleur de sel sur le caramel avant d'ajouter le crumble apporte un contraste délicieux qui rehausse les saveurs sucrées et crée un équilibre gustatif parfait.